The Reinebringen Hike, Step by Step
What does the Reinebringen trail actually feel like underfoot?
It's a continuous stone staircase of roughly 1,566 uneven steps gaining about 450 metres in under two kilometres, with almost no flat sections. The surface is solid dry-stone construction rather than loose scree, but the irregular step height makes both the climb and, especially, the descent tiring on the legs.
Four phases, one staircase
Break the climb into sections and it’s easier to plan around: a steep opening third, a slightly gentler middle stretch, a rocky final approach, and the summit ridge itself. None of these phases include real flat ground — this is a staircase, not a trail with a staircase section, and that distinction matters more than most people expect before they start.
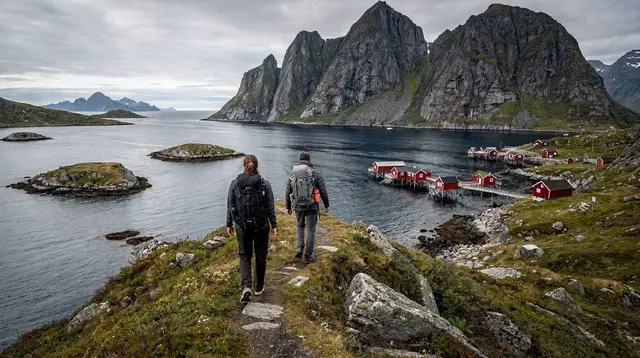
Trailhead to the first switchbacks. The path begins essentially at the edge of the parking area on the outskirts of Reine, just off the E10, with no warm-up distance before the steps start. Most visitors reach the trailhead by car from a base further along the archipelago — see getting around Lofoten for the driving realities — or on foot if staying in Reine or nearby Hamnøy. This opening section is the steepest sustained stretch of the whole climb, laid out in tight switchbacks that keep the village and fjord in view below — which is exactly why it’s also the section where people stop most often, adding time without adding much elevation.
The middle stretch. Gradient eases slightly here, though “eases” is relative — this is still a continuous climb, just with a more even rhythm than the switchbacks below. The stonework alternates with short stretches of exposed rock and low vegetation, and this is generally where hikers settle into a pace rather than stopping every few steps.
The upper approach. The maintained stone staircase gives way to a rockier, narrower path as you near the summit ridge, with the terrain becoming more natural underfoot and slightly less regular than the built steps below. Wind picks up noticeably here, since the terrain opens out of any shelter the lower slopes provided.
The summit ridge. The reward: an open viewpoint over Reine, its fjord, and the surrounding peaks, weather permitting. There’s room to sit and rest, though the exposed position means wind and temperature both feel more extreme here than at the trailhead.
Trail stats at a glance
| Metric | Detail |
|---|---|
| Distance (one way) | Approximately 1.8 km |
| Elevation gain | Approximately 450 metres |
| Steps | Roughly 1,566, unevenly spaced |
| Typical ascent time | 45 minutes to 1 hour |
| Typical descent time | Similar to ascent, often slower with tired legs |
| Round trip, including summit time | 2.5 to 4 hours |
| Surface | Dry-stone staircase, giving way to natural rock near the summit |
| Technical difficulty | None requiring hands-on scrambling if you stay on the steps |
Why the trail closes, and how to check
The staircase is closed for extended stretches of the year, and the reason is specific rather than a generic winter-caution notice: the uneven stone steps become genuinely dangerous once covered in snow or glazed with ice, since the same irregular risers that make the surface manageable in dry summer conditions turn into an unpredictable, slick obstacle course when frozen. A slip on an icy stone step here has real consequences given the sustained gradient on either side of you.
There’s no fixed calendar date for the closure — it tracks actual snow and ice conditions each year, which means a closure that started in early October one year might start later or earlier the next. The only reliable approach before a specific trip is to check current signage at the trailhead or recent local reports rather than relying on when the trail was open during a previous visit. If you’re planning a trip specifically to do this hike, build in flexibility around the date rather than locking a single day months in advance.
Outside the closure window, day-to-day conditions still matter enormously. Lofoten’s weather can shift within the hour, and rain on the stone steps changes the descent from merely tiring to genuinely slippery. Wind at the exposed summit ridge is reliably stronger than at the base, strong enough on a rough day to make lingering at the top uncomfortable even when the climb itself was fine.
Even a technically open trail can be a poor idea on a given morning if overnight rain has left the stones wet and the forecast shows more to come, or if wind warnings are in place for the exposed upper section. Treat “open” as a baseline condition to check, not a guarantee that today is a good day to climb — the two aren’t the same thing, and the gap between them is where most avoidable close calls on this trail happen, particularly among hikers arriving on a tight schedule who feel pressure to climb regardless of the morning’s actual conditions.
Pacing the climb without burning out
The single most common mistake on this specific trail isn’t a wrong turn — the route is a staircase, there’s nowhere to get lost — it’s starting too fast. The opening third is the steepest sustained stretch, and hikers who push hard through those first switchbacks in an effort to “get the hard part over with” often arrive at the gentler middle section already fatigued, which then makes the genuinely tougher upper approach and the descent both harder than they needed to be. A steadier, slower pace from the very first step tends to produce a faster overall time than an aggressive start followed by long recovery stops.
The second common mistake is treating the descent as the easy half. Because the climb demands more cardiovascular effort, it’s tempting to assume the way down will be simple by comparison. In practice, the uneven step heights are just as much of a factor going down, and tired leg muscles are less able to absorb the small stumbles that uneven stone steps produce. Slowing down on the descent, rather than hurrying to finish, is where trekking poles and proper footwear earn their weight most clearly.
Photographing the climb and the summit
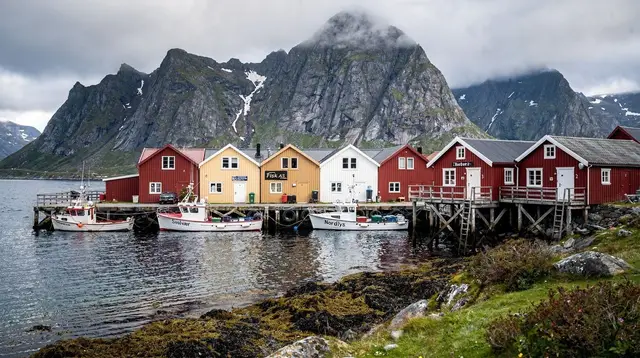
The switchback section near the trailhead offers some of the more striking compositions of the whole route, since it’s the point where the staircase, the village below, and the fjord are all visible in a single frame — a shot that gets harder to recreate once you’re higher up and the angle flattens out. At the summit itself, the classic composition looks back down over Reine’s rorbuer and the fjord beyond, and this is one climb where arriving with time to wait for a break in the cloud, rather than shooting the first clear moment and leaving immediately, tends to produce a noticeably better result — conditions at an exposed summit like this one can shift within minutes.
Wind is the main practical obstacle to photography at the top: a tripod on the exposed summit ridge needs to be weighted or braced, and handheld shots in a strong gust are harder to keep sharp than the same shot taken in the relative shelter of the middle section of the trail.
What to bring
- Footwear with real grip. This matters more here than on most Lofoten trails, given the uneven, occasionally wet stone surface.
- Trekking poles, genuinely useful on the descent where uneven steps punish tired knees more than the ascent does.
- A waterproof shell, regardless of how clear the sky looks at the trailhead — conditions at the exposed summit can differ sharply from conditions at the base.
- Water, since there’s nowhere to refill along the route.
- A layer for wind, even in summer, for the exposed ridge at the top.
For general safety practices that apply across Lofoten’s hiking trails, not just this one, see hiking safety in Lofoten and the wider mistakes to avoid in Lofoten, several of which come up specifically around this climb.
If you only have one day to try
On a multi-day trip, the sensible approach is to leave Reinebringen unscheduled until conditions look right, rather than locking it to a specific date on arrival. Because the trail is short enough to fit into half a day, it slots naturally into a free morning or evening once a clear forecast appears, without needing to be the anchor of an entire day’s planning the way a longer hike or a boat trip further afield might. Building in that flexibility matters more here than the round-trip time alone suggests, precisely because the payoff depends entirely on the summit being clear.
If your trip includes only a single day near Reine and the forecast for that day looks marginal, it’s worth treating the climb as optional rather than mandatory. A cloud-bound summit still costs the same physical effort as a clear one, and there’s rarely a way to know in advance whether the specific hour you’re climbing will land inside a clear window or a foggy one. Checking a same-day forecast rather than relying on a multi-day outlook gives a better read on whether that day is worth committing to.
When conditions make the climb not worth it
There’s a specific case for turning back or not starting at all: heavy rain, strong wind forecast for the summit, or a base-of-trail view that’s already clouded over. Because the entire point of this hike is the view from the top, climbing into cloud means gaining 450 metres of elevation for no payoff, and descending a wet stone staircase in poor visibility carries more risk than the view is worth. If conditions look marginal, this is one of the easier hikes on the islands to simply postpone a day, given how close it sits to Reine and how short the round trip is once conditions improve.
If the trail is closed for the season or the forecast rules it out on the day, a guided snowshoe route through the surrounding Reine terrain covers similar landscape at a pace and with equipment suited to snow conditions, and doesn’t depend on a single staircase being open.
Getting the view without the climb
Not every visitor wants or is able to do the climb, and the Reinebringen view isn’t the only way to see Reine from above or from a flattering angle. A private photo tour around Reine and Hamnøy can reach vantage points that don’t require the full staircase, useful for travellers short on time, mobility, or daylight. For a broader set of options beyond Reinebringen itself, photo spots around Reine and Hamnøy and easy walks in Lofoten both cover lower-effort alternatives.
If you’re specifically hunting for the classic elevated shot and want a guide who knows the terrain and the light, a private tour with a local guide can be tailored around Reinebringen conditions on the day, rather than a fixed group schedule that might land during a closure or a poor-visibility window.
How this compares to other Lofoten trails
Reinebringen is short in distance compared to Ryten and the Kvalvika hike, but its sustained, staircase-style gradient makes it feel harder minute for minute than longer trails with gentler grades. For a full ranking of options across the archipelago, the best hikes in Lofoten puts this one in context against both harder and gentler alternatives, and easy walks in Lofoten is the better starting point if a sustained 450-metre staircase climb isn’t what you’re after. If you’re staying nearby for a few days rather than passing through, where to stay in Lofoten and a three-day itinerary both cover how to build a stop like this into a longer stay around Moskenes and the western islands.
Reinebringen through the seasons
The trail’s open months line up closely with the region’s broader seasonal rhythm, and understanding that rhythm helps explain both why the closure exists and when a climb is actually worth planning around. The staircase typically reopens once the snow and ice that make it hazardous have cleared, generally sometime in late spring, and stays open through the warmer months before closing again as the first serious snowfall arrives in autumn — the exact dates tracking that year’s actual weather rather than a fixed calendar. That open window overlaps substantially with the region’s midnight sun period, roughly late May to mid-July, when the sun doesn’t set at all. A late-evening climb during those weeks is genuinely different from a midday one: the same view over Reine and its fjord, but under low, warm light rather than the flatter light of midday, and without any pressure to time the summit around a sunset that isn’t coming.
Temperatures on the trail itself, even during the open season, are moderated by the same Gulf Stream pattern that keeps this whole archipelago milder than its latitude suggests — summer air here generally runs around 12 to 17°C, though wind at the exposed summit ridge can make it feel noticeably cooler than that figure implies, especially compared with the more sheltered switchback section lower down. Because the trail is closed through the darkest months, it isn’t a realistic option during the polar night or deep into aurora season, roughly September through early April, when snow and ice typically make the steps unsafe regardless of how clear or dark the sky is that night. Travellers hoping to combine a Reinebringen climb with aurora hunting on the same trip should treat the two as separate windows rather than assuming both fit into the same week.
Reinebringen hike: common questions
How many steps does the Reinebringen trail actually have?
The commonly cited figure is around 1,566 stone steps, built as a dry-stone staircase rather than a single continuous flight, with the step height and depth varying throughout.
What time of year is the trail closed?
The staircase closes for extended periods when snow and ice make the stone steps hazardous, typically spanning autumn through late spring. Exact dates vary by year with conditions, so check current signage or local sources before planning around it.
How long does the climb take from the trailhead in Reine?
Most hikers take 45 minutes to an hour to reach the summit and a similar time to descend, with total round-trip time, including a break at the top, running 2.5 to 4 hours.
Is the descent harder than the climb?
Many hikers find it so. Uneven, irregularly spaced steps are more tiring on tired legs going down than going up, and a wet surface after rain makes the descent slower and more careful going than the ascent.
Do I need any special equipment?
Sturdy footwear with real tread is important given the uneven stone surface. Trekking poles are genuinely useful on the descent. No ropes, harnesses, or technical climbing gear are needed for the maintained staircase itself.
Can beginners do this hike?
A beginner with reasonable general fitness can usually manage it, but the sustained steep gradient with no flat recovery sections makes it more demanding than its short distance suggests.
Is there a shorter version of the hike?
Some hikers turn back partway up once the view over Reine opens up, without continuing to the true summit ridge, which shortens the outing but also shortens the view.
Hiking tours on GetYourGuide
Verified deep-linked GetYourGuide tours. Book through these links and we earn a small commission at no cost to you.
Photos show the destination, not the operator's own images.