Hiking Safety in Lofoten
What's the biggest hiking risk in Lofoten - is it the terrain or something else?
The single biggest factor is weather that changes within an hour, combined with trails that are mostly unmarked and unmaintained by any official body. Most incidents come from being caught out by a shift in conditions on an exposed ridge or scree slope, not from technical climbing difficulty.
Weather is the real hazard, not the terrain
Lofoten’s mountains are steep and dramatic, and that’s part of what draws hikers here, but the terrain itself is rarely the thing that actually causes trouble. The recurring, practical hazard is weather that changes within the hour: a clear morning can turn to wind, low cloud, or driving rain by the time you’re on an exposed ridge, well before you’re back at the car. The Gulf Stream keeps this region’s temperatures mild for the latitude - winters generally sit around 0 to -3°C and summers around 12 to 17°C - but mild temperatures don’t mean stable conditions. Treat every hike here as weather-dependent, check the forecast immediately before setting out rather than earlier in the day, and build in a turnaround point you’re willing to actually use.
Most trails are unmarked, and that’s normal here
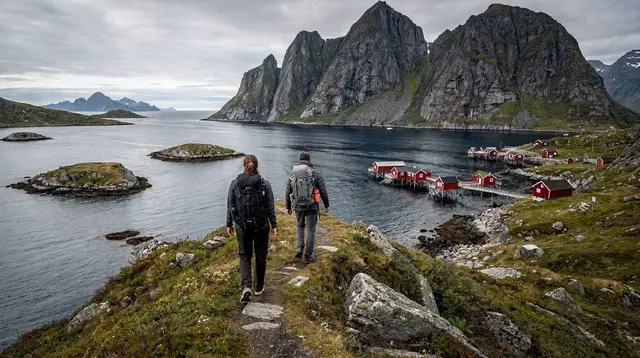
Unlike hiking regions with an extensive signposted network, much of Lofoten’s trail infrastructure is informal. Routes exist because people have walked them for years, not because a path authority laid them out and maintains them. A small number of the most-visited hikes have had deliberate work done - the stone staircase up Reinebringen, for instance, was built by Nepalese sherpa crews specifically to manage erosion and crowding on what had become a badly worn, informal trail. Our Reinebringen hike guide covers what that specific route is like on the ground. Elsewhere, expect faint paths, occasional cairns, and sections where the “trail” is really just the most logical line across open ground - which means route-finding, not just fitness, is part of what a hike here demands.
The hike out to Kvalvika beach and up the summit of Ryten above it is a good example of this pattern: accessible only on foot, without official waymarking for most of its length, and popular enough that a worn line is usually visible - but that line can be harder to follow in poor visibility or after dark. Our Ryten and Kvalvika hike guide and the broader best hikes in Lofoten guide go into specific route conditions in more depth.
Reading a forecast that actually helps
A generic daily forecast checked once in the morning isn’t enough on its own here - what matters more is wind speed and direction, visibility, and how those figures are expected to shift through the hours you’ll actually be on the trail, particularly near a summit or ridgeline where conditions diverge most sharply from what’s happening at the trailhead. A forecast showing a clear morning and a marginal afternoon is a real signal to start earlier rather than later, not a detail to skim past. Checking again partway through a longer hike, wherever signal allows, is a habit worth building even when the morning outlook looked settled - the region’s defining weather trait is exactly this kind of short-notice change, and a forecast checked at 7am says nothing reliable about conditions at 1pm on an exposed slope.
Building a layering system that actually works here
A single warm jacket isn’t enough on its own, because the range you might need to cover in one outing - a still, mild trailhead and a windy, wet ridgeline an hour later - is wider than most travelers plan for. A base layer that moves moisture away from skin, a mid layer for insulation you can add or remove as effort and wind change, and a genuinely waterproof and windproof outer shell cover most conditions the region throws at a hiker, even in summer when daytime temperatures sit in a comfortable 12 to 17°C range at low elevation - that same air feels very different once wind and altitude are added on an exposed slope.
Footwear matters as much as anything worn above the ankle. Loose rock and scree are common on the steeper, less-maintained routes, and ankle support plus a sole that grips wet rock reduces the single most common source of minor injury on these trails - a rolled ankle or a slip on wet stone. Trekking poles are worth carrying on anything involving a steep descent over scree, since they take real load off tired knees on the way down, which is usually harder on the body than the climb up. Gaiters are a small addition that matters more than it sounds on routes that cross boggy or consistently wet ground, keeping both feet dry and morale intact on longer days.
What to do if the weather turns while you’re out
The practical response to changing weather is straightforward but easy to skip under pressure: stop, reassess, and be willing to turn back before conditions get properly bad rather than after. Wind and reduced visibility matter more on ridgelines and near cliff edges than they do on lower ground, so treat any exposed section of a route as the point where a change in conditions should prompt a decision, not just an observation. Carrying enough layers to sit out a delay in poor weather, rather than assuming you’ll simply push through to the end, is the difference between an uncomfortable hour and a genuine emergency.
a guided hike into the Lofoten wilderness with a local guide managing route and weather decisionsremoves a meaningful share of this judgment call from your own shoulders, which is a reasonable choice for anyone less confident reading conditions in unfamiliar mountain terrain.
Mountain rescue: what actually happens if you need help
Norway’s general emergency number, 112, connects to organised emergency response, and Norway has a functioning search-and-rescue system. What’s worth understanding before you set out is that Lofoten is remote and mountainous, and a rescue response can take real time to reach an isolated trail - there’s no equivalent of a rapid response you might expect in a heavily trafficked, easily accessed hiking area elsewhere. That gap is exactly why prevention carries more weight here than in many other hiking destinations: telling someone your specific route and expected return time, carrying a charged phone, and turning back early when conditions deteriorate all reduce the chance you’ll need rescue in the first place, rather than relying on a fast response once you do.
While waiting for help, if a rescue does become necessary, staying visible, sheltered from wind, and as warm as your gear allows matters more than trying to keep moving toward the trailhead on an injury or in worsening conditions - a stationary, sheltered group is easier to locate and less likely to develop a second problem, such as hypothermia, on top of the original one. A whistle, a bright layer, and a phone with location services on are simple additions that make a genuine difference to how quickly a rescue team can narrow down where to look, particularly on routes without clear landmarks.
What actually goes wrong on a Lofoten hike
Most of the incidents that do occur here follow a small number of recognisable patterns rather than being random bad luck. A hike started later than planned runs into failing light on the descent, since daylight hours vary sharply by season and a route that looked comfortably timed in July can run out of usable light entirely in the shoulder seasons. A hiker underestimates how much longer the return leg takes on tired legs and loose scree compared with the ascent, and pushes on past the point where turning back was still the easier option. Footwear chosen for looks rather than grip becomes a liability on wet rock, which is common given how often this coastline sees rain or sea spray even on an otherwise clear day. None of these are unusual mistakes - they’re the ordinary ones that any unfamiliar mountain environment produces, and naming them plainly is more useful than a vague warning to “be careful.”
Matching the hike to your actual experience
Lofoten’s hikes span a wide range, from short, flat coastal walks to steep, exposed routes with serious elevation gain and no barriers at any point. Our easy walks in Lofoten guide covers routes suited to visitors who want scenery without technical difficulty, while the best hikes in Lofoten guide ranks the region’s more demanding options by what they actually require. The mistake worth naming directly: choosing a hike based on how the photographs look rather than an honest read of your fitness, footwear, and comfort with exposure. Our mistakes to avoid in Lofoten guide covers this pattern along with other common planning errors.
| Factor | Lower risk | Higher risk |
|---|---|---|
| Trail marking | Maintained routes like the Reinebringen staircase | Informal, worn-in paths with few or no markers |
| Exposure | Coastal and lower-elevation walks | Ridgelines, scree slopes, summit approaches |
| Weather window | Clear forecast, early start, planned turnaround | Late start, marginal forecast, no turnaround plan |
| Experience needed | Short, well-trodden routes | Routes requiring route-finding and steep scrambling |
Water, wet ground, and stream crossings
Beyond wind and rock, several of the region’s better-known routes involve wet ground or a stream crossing that isn’t always obvious from photos taken on a dry day. The approach near Fredvang toward Kvalvika beach and the Ryten summit above it crosses ground that can turn soft and slow after rain, which is common given how often this coastline sees precipitation even on an otherwise clear day. A crossing that’s a simple step-over in dry conditions can run noticeably higher and faster after a wet spell, and turning back or finding an alternate crossing point is the right call when the water looks higher or faster than it did on the way out - not a sign of overcaution. Waterproof, well-gripped footwear earns its place here as much as on exposed rock higher up.
Guided hiking: when it changes the risk calculus
A guide’s main value on the riskier end of Lofoten’s hiking spectrum isn’t fitness support - it’s local knowledge of current trail conditions, weather judgment, and a clear sense of when to turn back. For winter conditions specifically, when snow and ice change a trail’s difficulty substantially, a guided winter hiking trip departing from Reine handles route selection and pacing for terrain that’s meaningfully harder to judge solo once snow is involved. For visitors who’d rather build hiking into a broader look at the region without managing logistics themselves, a guided hiking tour of the Lofoten Islands, available in French is one option among several that pair a guide with a specific route.
Seasonal considerations
Summer’s long daylight, roughly late May to mid-July under the midnight sun, gives far more room to turn back and still reach the trailhead in good light than winter’s short days do, though summer also brings the most foot traffic on the well-known routes. Winter adds snow, ice, and reduced daylight to the same terrain, meaningfully changing the difficulty of routes that are straightforward in summer - our Lofoten in winter guide and weather in Lofoten guide cover what to expect by season in more detail, and our packing guide lists what to actually bring given how quickly conditions change here regardless of month.
Daylight itself is the variable that’s easy to underweight next to weather. Aurora season, roughly September through early April, comes with correspondingly shorter days, and a route that felt generously timed under the midnight sun between late May and mid-July can run into failing light hours earlier once autumn sets in - the same trail, the same fitness level, but a much narrower window to work with. Starting earlier than feels necessary, and treating the return leg’s timing as the constraint that decides when to turn back, matters more in the darker months than in summer, when the constraint is almost entirely down to weather and energy rather than light running out.
Telling someone your plan
The single cheapest safety measure available on any hike here costs nothing and takes a minute: telling someone - a host, a travel companion staying behind, or a friend back home - exactly which route you’re taking and roughly when you expect to be back. On a route with limited phone signal and no official trail register, this informal check-in is often the only mechanism that would trigger a search if something genuinely went wrong. It’s easy to skip on a short, popular hike that feels low-risk, but the habit is worth building regardless of how demanding a specific route looks on paper, since the actual risk on any given day depends as much on weather and daylight as on the route itself.
Phone signal and staying trackable
Coverage in Lofoten follows the road network fairly closely - signal is generally reliable in and around the main villages and along most of the E10, but it can drop out entirely in exposed high terrain, deep valleys, or on the far side of a ridge from the nearest mast. Downloading offline maps before setting out, rather than assuming a signal will be there when needed, is a habit worth building on any route that climbs away from the main road. A charged phone still matters even without signal, both for its GPS function and as a light source if a return runs later than planned, and a paper map or a pre-saved offline route is a reasonable backup for anyone hiking the less-travelled options where losing a signal-dependent app partway through would otherwise leave no reliable way to check position.
Getting to the trailhead
Most hikes worth planning around sit some distance from the airports at Leknes or Svolvær, and reaching them realistically requires a car - our car rental guide covers what to expect on the narrow roads leading to many trailheads. If a full trip built around hiking is the goal rather than a single route, our 6-day hiking itinerary sequences several of the region’s routes with rest and weather buffer days built in, which matters given how often a single bad-weather day can force a change of plan.
A note on group trips beyond hiking
Not every day in Lofoten needs to be a hike, and pairing a demanding trail day with a lower-effort outing is a reasonable way to manage fatigue and weather risk across a longer trip. A multi-day guided tour covering Lofoten’s top highlights, including some walking, over three days is one way to see a broad cross-section of the islands without every day depending on a single demanding route holding up in bad weather.
Hiking safety questions people ask before their Lofoten trip
Are Lofoten’s hiking trails officially marked and maintained?
Some of the most-visited routes, such as the stone staircase up Reinebringen, have had deliberate trail work done to manage erosion and crowding. Many others are informal paths worn in by hikers over the years, with little to no signage, marking, or maintenance, so route-finding is your responsibility.
How quickly can the weather change on a Lofoten hike?
Conditions can shift within an hour - clear skies can give way to wind, low cloud, or rain with little warning, especially at higher elevation. Check the forecast immediately before setting out rather than relying on a forecast from earlier in the day.
Is there mountain rescue coverage in Lofoten?
Norway has an organised emergency response system reachable through the general emergency number 112, but Lofoten is remote and mountainous, and a rescue can take considerable time to reach an isolated trail. Prevention - turning back early, telling someone your plan - matters more here than in areas with faster response times.
Do I need hiking experience to walk in Lofoten?
It depends entirely on the trail. Some routes are short, flat, and accessible to most fitness levels, while others involve steep, exposed terrain with real elevation gain and no barriers. Match the hike to your actual fitness and experience rather than to how the photos look. A route that photographs as an easy walk can still involve real elevation gain or exposed sections once you’re actually on it, which is part of why matching the plan to the specific trail description matters more than trusting a general impression from images alone.
What should I always carry on a Lofoten hike?
Layers well beyond what the daytime forecast suggests, rain and wind protection, more water and food than feels necessary, a fully charged phone, and a way to check the forecast and your position. Sturdy footwear matters on the loose rock and scree common to many trails.
Should I hike alone in Lofoten?
Hiking with at least one other person is generally safer given how remote and unmarked many trails are. If hiking alone, tell someone your specific route and expected return time before setting out, since help may take time to arrive if something goes wrong.
Is a guided hike safer than hiking on my own?
A guide who knows the terrain, current conditions, and turnaround points removes much of the route-finding and weather-judgment risk, which matters most on the more exposed or less-travelled routes. Self-guided hiking on the well-known, better-marked trails is a reasonable option for experienced hikers with the right gear.
Hiking tours on GetYourGuide
Verified deep-linked GetYourGuide tours. Book through these links and we earn a small commission at no cost to you.
Photos show the destination, not the operator's own images.