The Best Hikes in Lofoten, Ranked by Real Difficulty
What is the best hike in Lofoten?
There's no single best hike, because the trails vary enormously in difficulty. Reinebringen is the shortest and steepest, with dramatic views for relatively little walking time; Ryten above Kvalvika beach is longer and more exposed to route-finding and weather; and a string of easier coastal walks near Haukland, Uttakleiv, and Eggum need no real hiking experience at all.
Difficulty First, Views Second
Every list of Lofoten’s best hikes leads with the photographs — and the photographs are real, the views from up on these ridges are genuinely dramatic. What gets skipped far more often is the part that actually matters before you leave the car: how steep the trail is, how long you’re actually exposed to a drop or a scramble, and what happens to that trail the moment the weather turns, which in this part of Norway can happen inside an hour. This guide ranks the region’s known hikes by real difficulty and realistic walking time, not by how good the summit photo looks. Read hiking safety in Lofoten alongside this page before you commit to anything above the easiest tier.
How the Ranking Works
Three things separate an easy Lofoten walk from a genuinely demanding one: steepness (a short trail can still be brutal if it gains height fast), exposure (sections with a real drop next to the path, where poor footing or wind matters), and weather dependency (how much a trail relies on clear visibility to be safe, versus one you can still do sensibly in flat light or drizzle). The tiers below are ordered from least to most demanding on all three counts together, not just by distance.
| Tier | What it feels like | Weather sensitivity |
|---|---|---|
| Easy coastal walks | Flat to gently rolling, no exposure, minimal route-finding | Low — doable in most conditions short of a storm |
| Reinebringen | Short distance, extremely steep, some exposure near the top | High — the view is the whole point, and cloud erases it |
| Ryten (via Kvalvika) | Longer, moderate-to-strenuous, exposed ridge sections | High — route-finding gets genuinely harder in poor visibility |
| Svolværgeita approach | Scramble/climbing terrain, not a straightforward hike | Very high — this is closer to climbing than hiking |
Easy: The Coastal Walks Around Haukland, Uttakleiv, and Eggum
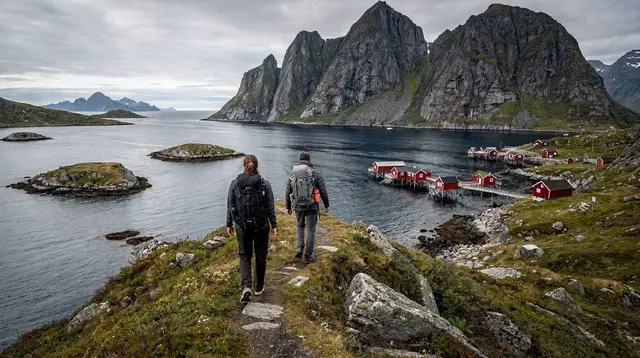
If you want real Lofoten scenery — white sand against dark peaks, open Atlantic light — without a steep climb or any real exposure, the coastline around Haukland and Uttakleiv beaches on Vestvågøya is the place to start. The walking here is flat to gently undulating, following the shoreline and low headlands rather than climbing a mountainside, and it needs no particular fitness or hiking experience. Further along the coast, Eggum offers a similarly low-key stretch of open, windswept shoreline, good for a few unhurried hours rather than a full day’s hike.
These walks are also the most forgiving when the weather doesn’t cooperate. A grey, blustery afternoon that would erase any view from Reinebringen still delivers a decent, moody walk along Haukland or Uttakleiv, because the appeal here is the coastline and the light rather than a single payoff view from altitude. If your trip includes travelers who don’t want a steep climb — or simply a day when the forecast rules out anything higher — this tier is the one to fall back on. The easy walks guide covers more of this same lower-effort tier in detail.
Kvalvika beach itself, reached on foot from Fredvang without continuing up to the Ryten summit, sits at the upper end of this easy tier: it’s a real hike, not a stroll, but one that ends at a beach rather than a mountain top, and it can be treated as a worthwhile destination on its own rather than only the first half of the Ryten route described below.
Moderate to Strenuous: Ryten, Above Kvalvika Beach
Ryten is the summit that rises above Kvalvika beach on Flakstadøya, reached on foot from Fredvang — there’s no direct road access to Kvalvika, which is part of what keeps this stretch of coast quiet. Compared with Reinebringen, Ryten is a longer undertaking: expect a route that takes up a significant part of a day rather than a couple of hours, with sustained climbing, sections where the path is less obvious underfoot, and stretches along an exposed ridge where wind and wet rock both become real factors.
This is the trail where “don’t romanticize the exposure” matters most. The reward — a wide view down onto Kvalvika’s beach and the open sea beyond — is genuinely striking, and it’s also exactly the kind of view that gets people pushing on in weather they shouldn’t. Poor visibility on this ridge doesn’t just cost you the photo; it makes the route-finding meaningfully harder, since the path isn’t a paved staircase the way Reinebringen’s is. Turn back if cloud comes in before you’re committed to the exposed sections, and don’t attempt this one as your first Lofoten hike if you have no experience judging mountain weather. The full route breakdown, including where the trickier sections sit, is in the Ryten and Kvalvika hike guide.
For hikers who’d rather have someone else managing the pace, navigation, and weather calls on terrain like this, a guided trail run is one way to cover mountain ground here with support rather than solo:
a guided trail run across Lofoten’s mountain terrain, aimed at hikers and runners who want the ground covered with a local pacesetter rather than soloShort but Brutal: Reinebringen
Reinebringen sits above Reine on Moskenesøya and is probably the single most photographed viewpoint in the archipelago — the shot looking straight down onto Reine’s harbor and the peaks around it shows up constantly in anything written about Lofoten. What that photo doesn’t convey is how the trail actually behaves: it’s a stone staircase of more than 1,500 steps, built by Nepalese sherpa trail crews, that gains height directly and relentlessly rather than switching back gradually. It is short in distance and long in effort — most people are up and down within a few hours, but those hours are spent almost entirely climbing or descending, with limited flat ground to recover on.
Near the top, the trail includes exposed sections where the drop is real and the footing on wet stone steps needs real attention, especially descending, when legs are tired and stone is often damp regardless of season. This is not a trail to treat casually because it’s short — short and steep is its own kind of hard, and the exposure near the summit deserves the same respect as anything on Ryten’s ridge. Full route detail, timing, and what the steps are actually like underfoot are in the Reinebringen hike guide; the story of how the staircase came to be built is told separately in the Reinebringen stairs story.
Anyone who wants the view without the climb has one legitimate option: a private, vehicle-based photo tour built around Reine and Hamnøy reaches several of the same dramatic angles from the road and short walks, without the 1,500-step ascent:
a private photo tour around Reine and Hamnøy that reaches many of the classic viewpoints without the Reinebringen climbBeyond Hiking: Svolværgeita
Svolværgeita — “the Goat” — is the rock needle rising above Svolvær, and it belongs in a different category from everything above it on this list. Reaching its two horns is a scramble and a short technical climb, not a hike, and it’s included here mainly so it doesn’t get mistaken for one. If climbing is genuinely what you’re after, treat it as a climbing objective with the right gear and, ideally, a local guide — not as the next difficulty step up from Ryten. See the destination page for Svolværgeita for what it actually involves, and the broader climbing guide if you want routes suited to your level rather than assuming this one is a natural progression from hiking.
Weather Is the Real Difficulty Rating
None of the tiers above hold up if the weather doesn’t cooperate, and this is worth repeating because it’s the single biggest practical fact about hiking here: conditions can shift from clear to socked-in within about an hour, at any time of year. A trail that’s straightforward in the morning can be genuinely dangerous by afternoon if wind picks up on an exposed ridge or visibility drops on a route where the path itself depends on being able to see it.
Practical habits that matter more than fitness level:
- Check the forecast the morning of, not the night before. Coastal weather here changes fast enough that yesterday’s forecast is not a reliable guide.
- Turn back before you’re committed to exposed terrain, not after. This applies most on Ryten’s ridge and the upper sections of Reinebringen.
- Don’t schedule a hike for your only clear-weather window and then push it in marginal conditions anyway — if the forecast is genuinely bad, an easier coastal walk near Haukland or Uttakleiv is a legitimate substitute for the day, not a consolation prize.
- Layer for a temperature swing. Summer highs here run roughly 12 to 17°C and winter closer to 0 to −3°C thanks to the Gulf Stream, but wind and altitude change how that feels quickly on an exposed summit.
For the seasonal picture in more depth, see weather in Lofoten and the best time to visit.
Hiking by Season
Trail conditions here are not static across the year, and that changes both the difficulty and the gear list, not just the view.
| Season | What changes on the trails |
|---|---|
| Summer (Jun–Aug) | Most stable footing, longest daylight including the midnight sun window, busiest trailheads |
| Shoulder (May, Sep) | Variable snow cover possible at altitude, fewer people, less predictable conditions |
| Winter (Oct–Apr) | Snow and ice likely on higher or exposed sections, shorter daylight, different gear needed entirely |
Winter hiking here isn’t simply “summer hiking, colder” — it changes what’s realistic to attempt without the right equipment and local knowledge, and it’s exactly the kind of terrain and season combination where a guided option pays for itself in judgment rather than convenience:
a guided winter hiking trip out of Reine, suited to travelers who want mountain terrain covered safely once snow and ice are part of the pictureFor a fuller seasonal comparison beyond hiking specifically, see Lofoten in winter and Lofoten in summer.
Planning Hiking Days Into a Trip
Because the hardest hikes here depend so heavily on weather cooperating, it’s worth building slack into a Lofoten itinerary rather than assigning one hike to one specific day and hoping. A trip structured with several days and flexible order — rather than a tight one-hike-per-day schedule — is far more likely to actually deliver Reinebringen or Ryten in decent conditions, simply because there are more chances for a clear window. The 6-day hiking-focused itinerary is built with that flexibility in mind. For travelers who’d rather not navigate route logistics and transport between trailheads themselves, guided road-trip and hiking combinations around Reine and Å bundle transport with a set route:
a guided road trip through Reine and Å that pairs driving with walking stops, useful for travelers without their own vehicleFrench-speaking travelers who’d prefer a guide explaining terrain and route decisions in their own language, rather than working through English safety instructions on unfamiliar ground, have that option too, and it’s worth asking about specifically when booking rather than assuming every guided trail is run only in English.
A last point worth stating plainly: none of the guided options above are a substitute for basic trail sense if you go without one. A guide changes who is making the weather and route calls, not whether those calls need making. Solo hikers on Reinebringen or Ryten should still carry a map or offline route, check in with someone about their plan, and be honestly prepared to turn around — the mountain doesn’t know whether you booked a guide or not, and neither does the weather.
Pack accordingly — see the Lofoten packing guide for what actually belongs in a daypack here versus what’s dead weight, and car rental in Lofoten plus getting around Lofoten for reaching trailheads that, in several cases including Kvalvika and Ryten, aren’t served by any public transport at all.
Choosing a Hike That Matches the Day You Actually Have
The honest way to pick a hike here isn’t “which one is famous” — it’s matching the trail to the weather window and energy you actually have that day. A clear, calm morning with a full day ahead is a legitimate Ryten day. A shorter window, or a forecast with a chance of cloud rolling in by early afternoon, points toward Reinebringen instead, since its shorter total time makes it easier to complete before conditions shift. And a day that’s genuinely poor — heavy rain, low cloud, high wind — is not a day to force either of them; the coastal walks near Haukland and Uttakleiv, or simply the approach to Kvalvika beach without continuing to Ryten’s summit, remain worthwhile without demanding the same weather.
None of this is about being risk-averse for its own sake. It’s about matching real difficulty, honestly stated, to the conditions in front of you — which is exactly what a hike list that skips the exposure and the weather sensitivity fails to do.
Frequently Asked Questions About Hiking in Lofoten
Which Lofoten hike is hardest?
Ryten, above Kvalvika beach, tends to be the most demanding of the well-known trails because of its length, exposed sections, and the amount it depends on route-finding in poor visibility. Reinebringen is shorter but extremely steep, which makes it hard in a different, more concentrated way.
How long does the Reinebringen hike take?
Most hikers cover the round trip in a few hours, but the number that matters more than any total time is the steepness: it’s a short, direct, unrelenting climb up a long stone staircase, not a long day out.
Do I need hiking experience for Lofoten’s trails?
For the coastal walks near Haukland, Uttakleiv, and Eggum, no. For Reinebringen and especially Ryten, some fitness and comfort with steep, sometimes narrow terrain matters, and neither should be treated as a casual afternoon stroll.
Is it safe to hike in Lofoten without a guide?
Many people do it safely every year, but the region’s weather can turn in about an hour, and that single fact is responsible for most of the trouble hikers get into here. Check conditions before setting out, turn back if weather closes in, and don’t push exposed sections in poor visibility.
When is the best season for hiking in Lofoten?
Summer (roughly June through August) gives the most stable underfoot conditions and the longest daylight, including the midnight sun window. Trails can carry snow and ice well into spring and return to it in autumn, which changes both the difficulty and the gear needed.
Are there guided hiking options for people who don’t want to go alone?
Yes. Guided trail runs, winter hiking trips, and photography-focused walks around Reine and Å are available and remove the route-finding and weather-judgment burden, which is worth considering for anyone unfamiliar with mountain terrain that changes conditions quickly.
Can beginners still get a good view without the hardest hikes?
Yes. The easier coastal walks around Haukland, Uttakleiv, and Eggum, plus the approach to Kvalvika beach itself without continuing up to Ryten’s summit, deliver real Lofoten scenery without the steep climbing or exposure of Reinebringen or the Ryten ridge.
Hiking tours on GetYourGuide
Verified deep-linked GetYourGuide tours. Book through these links and we earn a small commission at no cost to you.
Photos show the destination, not the operator's own images.