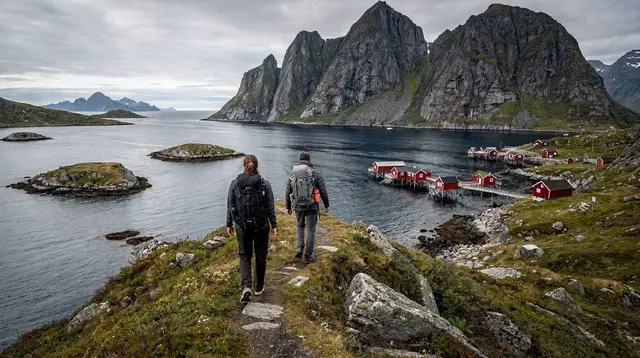
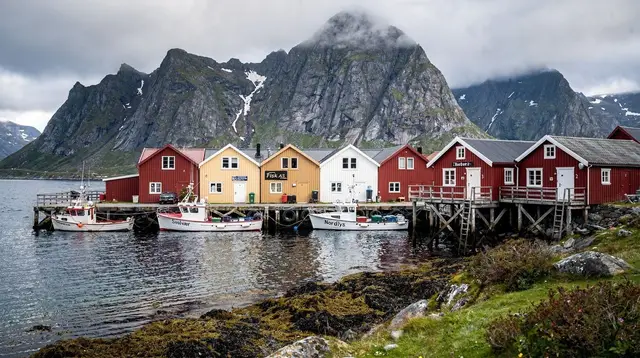
6 Days of Hiking in Lofoten: From Marked Trail to Real Exposure
How this route is built
This itinerary is built around a deliberate progression rather than a random string of trailheads. It opens with easier, well-marked coastal walking, moves through moderate elevation, and ends with the two hikes in the archipelago that carry genuine exposure — Reinebringen’s stone staircase and the Kvalvika–Ryten route, which only exists as a footpath. Each day includes a lower-effort fallback for when the weather doesn’t cooperate, because in this archipelago it often won’t: conditions here can shift within an hour, and no day of this plan should be treated as fixed regardless of what the sky is doing that morning.
A rental car is assumed throughout, since the route spans Austvågøya, Vestvågøya, and Moskenesøya, connected by the E10 but spread across meaningful driving distances.
| Day | Focus | Character |
|---|---|---|
| 1 | Haukland Beach | Easy, marked coastal walk |
| 2 | Eggum coastal trail | Moderate, open landscape |
| 3 | Transfer day, short walk | Low effort, driving-heavy |
| 4 | Svolværgeita approach trail | Moderate–steep, no technical climbing |
| 5 | Reinebringen | Steep stone stairs, real exposure at the top |
| 6 | Kvalvika Beach via Ryten | Full-day, remote, most exposed route of the week |
Day 1: Haukland Beach, easing in
The week starts gently, on Vestvågøya, with the walk around Haukland Beach. The trail here is well marked and doesn’t demand technical footing, making it a reasonable first day to test gear, boots, and how the body handles a few hours of coastal walking before the week’s harder days. The beach itself, backed by steep hills, gives an early look at the kind of scenery that defines the rest of the trip without any of the exposure that comes later in the week.
Give this first day more time than the terrain alone would suggest, not because the walking is hard, but because it’s the day to notice how boots, pack straps, and any borrowed rain gear actually perform before committing to the longer routes later on. A blister or a chafing strap discovered here is a minor annoyance; discovered on Day 6, on the way out to Kvalvika, it’s a real problem with no easy way to cut the day short.
Bad-weather fallback: the beach walk is short enough to do in a rain jacket without much loss of enjoyment, but if wind is severe, a shorter loop nearer the car park covers the same views with less time exposed to the coast.
Day 2: Eggum, open coastline
A short drive further along brings you to Eggum, where the trail runs along more open, rugged coastline with fewer trees and a wider sense of scale than Haukland the day before. This is still a moderate walk rather than a technical one, but the ground is rockier and the wind more exposed, which makes it a sensible second day — harder than Day 1, easier than what’s coming from Day 4 onward.
Eggum sits more directly open to the sea than Haukland, and the wind here is noticeably less predictable — a still morning at the car park doesn’t guarantee still conditions once the trail reaches the more exposed stretches further along the coast. Treat this day as a test of layering as much as of legs, and don’t be surprised if you’re adding or shedding a layer more often than the temperature alone would explain.
Bad-weather fallback: Eggum’s coastal trail has several natural turnaround points, so the walk can be shortened significantly without missing the main viewpoints if visibility drops or wind picks up.
Day 3: Transfer and a short leg-stretch
Day 3 is built around distance rather than difficulty — moving from Vestvågøya toward Svolvær on Austvågøya to set up for the next two days. The E10 covers this ground with several worthwhile stops along the way, including Kabelvåg, making it easy to break up the drive rather than treating it as pure transit. A short walk near Svolvær in the afternoon keeps the legs moving without adding real effort to a day that’s mostly about repositioning.
Bad-weather fallback: this is already the lightest day of the week, so poor weather simply means skipping the optional afternoon walk and using the extra time to check forecasts for the two harder days ahead.
Day 4: The approach trail below Svolværgeita
Day 4 steps up in both elevation and character, following the approach trail partway up the mountain behind Svolvær toward Svolværgeita. This is not the technical climbing route to the spire’s summit horns — that requires rope and climbing experience entirely separate from this itinerary — but the approach trail itself climbs steadily and delivers genuine elevation over the town and fjord, with more exposed, rockier ground than anything so far this week.
Bad-weather fallback: the lower portion of the trail still delivers solid views over Svolvær harbour without committing to the full elevation gain, a sensible option if wind or low cloud makes the upper mountain unappealing.
Day 5: Reinebringen, the stairs
The drive from Svolvær to Reine covers most of the archipelago’s length, arriving at Moskenesøya for the week’s best-known hike: Reinebringen, a stone staircase of some 1,566 steps built by Nepalese sherpas, climbing directly above the village to a viewpoint over Reine’s islands and fjord. It’s a demanding, sustained climb rather than a technical one — no ropes or scrambling — but the exposure at the top, on open rock with a long drop below, is real, and the stairs themselves are relentless rather than gradual.
Bad-weather fallback: the staircase is genuinely unpleasant and more dangerous in high wind or wet, slick stone, so this is one day where postponing to a clearer window, if the itinerary has any flexibility, is worth doing rather than pushing through poor conditions purely to keep to schedule.
Day 6: Kvalvika Beach via Ryten
The final day is the most demanding and the most rewarding: the hike to Kvalvika Beach, accessible only on foot from Fredvang, typically combined with the summit of Ryten above it. This is the week’s longest and most remote route — no road access, more exposed terrain along the ridge, and a full day’s commitment rather than a half-day outing. The reward is a beach that can’t be reached any other way, framed by the steep terrain that makes the approach itself part of the experience.
Bad-weather fallback: in poor visibility or strong wind, the ridge to Ryten’s summit is the section to skip — the walk down to Kvalvika Beach alone, without the summit detour, is shorter and less exposed, and still delivers the destination itself.
Reordering the week when the forecast changes
The order above assumes a normal run of Lofoten weather — some sun, some rain, nothing extreme for more than a day at a time. If a genuinely bad stretch is forecast for the days built around Reinebringen or the Ryten ridge, it’s worth reordering the itinerary rather than pushing through: swap Day 3’s transfer day for whichever hard day has the clearer forecast, and use the built-in slack of the transfer day to absorb a delay elsewhere. This works because Day 3 has almost no fixed commitment of its own — it exists specifically to give the schedule room to move.
The two days least worth compromising on are 5 and 6: Reinebringen’s stairs turn genuinely hazardous in wind or wet stone, and the Ryten ridge above Kvalvika has real fall consequences if visibility drops. If the forecast for both of those days looks poor and there’s no room left in the schedule to wait for a better window, it’s more sensible to do the shortened, lower-effort fallback version of each — described above — than to attempt the full route in marginal conditions.
Gear and general planning
Across all six days, layers matter more than any single piece of gear — temperatures swing with elevation and wind exposure even within a single hike, and rain gear should be treated as a given rather than an optional extra regardless of the morning’s forecast. Footwear with real ankle support and a solid grip matters especially for Days 5 and 6, where wet rock and stone steps are unforgiving. Food and water for Day 6 in particular deserve more thought than a normal day hike, since there’s no shop, café, or other resupply point once you’re past Fredvang and on the trail toward Kvalvika — whatever you carry in is what you have until you’re back at the car. A headlamp is worth packing outside the height of summer, since daylight on the shoulder seasons can run out faster than a longer day’s hiking pace allows for, particularly if Day 6 runs long.
None of this gear is exotic or hard to source before the trip, but none of it should be left as an afterthought given how remote some of these trailheads are once you’re past the first kilometre. General trail safety practices, including how to read this region’s fast-changing weather, are covered in the hiking safety guide, and it’s worth reading before setting out on Day 4 onward. For those wanting a broader view of the archipelago’s trail options beyond this specific route, the best hikes in Lofoten guide covers the wider selection, and the dedicated Reinebringen and Ryten–Kvalvika guides go deeper into those two specific trails.
For evenings after the harder days, a change of pace like a guided kayak trip in Reinefjord offers a low-impact way to see the same fjords from the water instead of the trail, and on clear nights outside the summer season, a northern lights tour from Svolvær is worth building into the schedule as a non-hiking evening activity.
Questions about this hiking itinerary
Do I need climbing experience for any of these six days?
No. This itinerary sticks to hiking trails rather than technical climbing routes — the approach trail below Svolværgeita is not the same as the roped climb to its summit horns, and Reinebringen, while steep and exposed at the top, is a stone staircase rather than a climb.
Which day is the hardest?
Day 6, the Kvalvika Beach and Ryten route, is the longest and most remote. Day 5, Reinebringen, is shorter but more sustained and exposed underfoot on the stairs themselves.
Is a car necessary for this itinerary?
Yes. The route spans three islands connected by the E10, and public transport doesn’t realistically cover the trailhead access needed each day.
What happens if the weather is bad for several days in a row?
Each day above includes a lower-effort fallback, but a stretch of genuinely poor weather may mean skipping the most exposed sections — particularly the Reinebringen stairs and the Ryten ridge — rather than pushing through conditions that aren’t worth the risk.
Can this itinerary be shortened to fewer than six days?
Yes, by dropping Day 3 (the transfer day) or combining Days 1 and 2 into a single, longer day on Vestvågøya, though that reduces the recovery time between the harder hikes later in the week.
What time of year suits this itinerary best?
Summer offers the most daylight and driest trail conditions, which matters most for the exposed sections on Days 4 through 6. Outside summer, shorter days and wetter, more slippery rock make the same route considerably harder.
Hiking tours on GetYourGuide
Verified deep-linked GetYourGuide tours. Book through these links and we earn a small commission at no cost to you.
Photos show the destination, not the operator's own images.