A 6-Day Lofoten Photography Itinerary, Built Around Light
Most Lofoten itineraries are built around driving distance: how far from A to B, how many stops fit in a day. This one is built around something else — the hours when the light actually works. Six days is enough time to hit the same locations more than once under different conditions, rather than treating each stop as a single photograph checked off a list. Distances between these destinations are all modest by any normal road-trip standard; what determines the schedule below is light, not kilometers.
A note before you start: Lofoten’s weather changes within the hour, which means this itinerary works better as a flexible sequence than a rigid schedule. If Day 2’s forecast looks better for Reine than Day 1’s does, swap them. The order matters less than staying responsive to what the sky is actually doing.
Day 1: Arrival and orientation around Reine
Spend the first day settling in and scouting rather than shooting your most important frames. Reine makes a strong base for this itinerary — central enough to reach the other destinations without excessive backtracking, with enough of its own harbor scenery to fill an afternoon on its own.
Use the evening light — long regardless of season outside deep winter — to walk the harbor and identify vantage points for Hamnøy and Sakrisøy nearby, both visible from pullouts along the road rather than requiring a hike to reach. Photographing them properly comes on Day 2; today is about knowing where you’ll stand.
Reine also works as a practical base for logistics, not just scouting: it’s central enough that none of the following five days require a long drive back to restock or change plans, and its own harbor gives you a fallback location if arrival day turns out wetter or greyer than hoped. Since Lofoten’s weather can flip within the hour, treat this first afternoon as low-stakes — the point is orientation, not a portfolio shot, so a flat or overcast arrival doesn’t cost you anything.
Day 2: Hamnøy and Sakrisøy at their classic angle
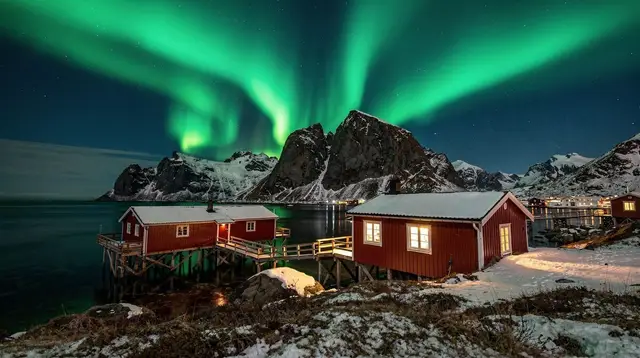
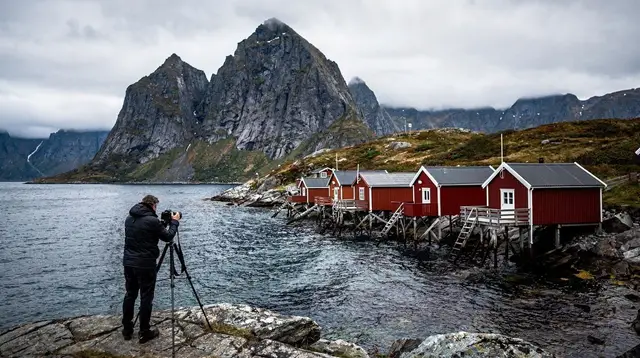
Hamnøy and Sakrisøy produce some of the most photographed views in all of Lofoten — red rorbuer against the peaks behind Reine — and both reward early and late light far more than the middle of the day. Plan to be in position well before the light softens, whether that’s early morning or the long evening hours of summer.
Because both locations sit close together, there’s no need to rush between them. A guided option exists for this stretch of coast: a three-hour guided kayak tour from Reine offers a genuinely different vantage point on the same landscape — from the water rather than the road — for photographers wanting a variation on the classic angle.
Midday, when the light is flattest, is the right time for the practical tasks: checking gear, reviewing what you shot the previous evening, and driving toward the next base if needed.
Access here is straightforward — both viewpoints sit within a short walk of E10 pullouts, so this isn’t a hiking day, but it is a weather-dependent one. Wind off the water can be sharp even when the Gulf Stream keeps temperatures themselves mild, so plan for a tripod that holds steady rather than one that catches every gust, and budget extra time on the roadside rather than assuming you’ll get the shot on the first attempt.
Day 3: Henningsvær, and photographing a working harbor
Henningsvær is a different kind of subject from Reine’s peaks-and-rorbuer postcard — it’s a still-working fishing harbor spread across small islets, with its own texture of boats, nets, and a well-known football pitch tucked between buildings. This is a location that rewards wandering rather than a single fixed viewpoint; the interesting frames here tend to be found by walking the harbor’s edges rather than shooting from one spot.
Late afternoon into evening again offers the most workable light, and Henningsvær’s cafés make it easy to wait out a stretch of flat midday light without losing the day entirely.
Give this stop more time than the drive suggests you’ll need. Henningsvær is spread across several small islets connected by short bridges, and the working parts of the harbor — nets drying, boats coming and going — change through the day in ways a village built purely for tourism wouldn’t. A full afternoon into evening is realistic if you want more than a single vantage point; treat the football pitch, tucked between buildings near the water, as one stop among several rather than the whole visit.
Day 4: Uttakleiv Beach, texture and long exposure
Uttakleiv Beach shifts the itinerary’s register again — this is a coastal, rock-and-water subject rather than a village scene, well suited to long exposures if you’re carrying filters, or to close-in texture work on the beach’s rock formations if you’re not. Uttakleiv sits near Haukland, close enough to combine both in a single day if conditions or light favor moving between them.
Evening is again the strongest window here, particularly for anyone working with reflections in the wet sand or long-exposure water. If the forecast looks unfavorable for the coast on this day, this is one of the more flexible stops to swap with Day 5 rather than the harbor-focused days, which depend more on being in a specific place.
Conditions on an exposed beach like Uttakleiv can shift faster than they do in a sheltered harbor, so treat the plan for this day as the loosest of the six. Wind-driven spray affects gear more here than at any other stop on this itinerary, and a change in wind direction can turn a promising long-exposure setup unworkable within the hour — worth checking conditions again once you’ve arrived rather than committing fully based on a forecast checked that morning.
Day 5: Nusfjord, and a slower, quieter register
Nusfjord, the preserved fishing village on Flakstadøya, offers a different kind of photography from the previous four days — smaller in scale, built around wooden buildings and drying racks rather than mountain backdrops. It photographs well under flat or overcast light in a way that some of the wider landscape stops don’t, which makes it a sensible choice if the weather turns less cooperative partway through the week.
Pair Nusfjord with Ramberg beach on the same day if time allows — both sit on Flakstadøya and the drive between them is short.
For those who’d rather have a guided structure covering several of these same locations without self-driving the whole route, a three-day guided photo tour of Lofoten’s top highlights covers much of the same ground as Days 2 through 5 for travelers with less time or without a rental car.
Day 6: Return to your strongest location
Six days gives you something a shorter trip doesn’t: the chance to go back. Use the final day to revisit whichever of the previous stops produced the most promising light but the least satisfying result — often this is Hamnøy or Sakrisøy, simply because their fame means expectations run highest, but it could just as easily be Henningsvær if the harbor’s working boats weren’t where you wanted them on Day 3.
If the week’s weather has been genuinely favorable and nothing needs a second attempt, use the day instead for a sea eagle and nature safari, which opens up a wildlife-photography angle the rest of the itinerary doesn’t cover.
Deciding which is worth another look comes down to what actually went wrong the first time, not just which shot you liked least. A location that underperformed because of flat, grey light is worth revisiting if the forecast has genuinely improved; one that underperformed because of a crowd, a parked car in the frame, or a tide that wasn’t right is worth revisiting regardless of what the sky does, since those problems have nothing to do with weather and everything to do with timing your return for the specific conditions that were missing the first time.
| Day | Focus | Light priority |
|---|---|---|
| 1 | Reine, orientation | Evening scouting |
| 2 | Hamnøy, Sakrisøy | Early and late light |
| 3 | Henningsvær | Late afternoon into evening |
| 4 | Uttakleiv Beach | Evening, long exposure |
| 5 | Nusfjord | Flexible, works under flat light |
| 6 | Revisit or wildlife | Depends on prior days |
Evenings after dark
Outside the midnight sun period (roughly late May to mid-July), evenings open up a second photography opportunity entirely: the northern lights, visible roughly September through early April given a dark, clear sky. If your six days fall within that window, a guided northern lights tour departing from Svolvær is worth booking for at least one evening, ideally with some flexibility built in given how dependent aurora viewing is on clear conditions.
Choosing a base: one hotel or a different one each night
There are two workable ways to structure the sleeping arrangements for this route. Basing yourself in or near Reine for the full six days keeps logistics simple — it sits close enough to Hamnøy, Sakrisøy, and Nusfjord that none of those days involve a long drive back, and Henningsvær and Uttakleiv are both manageable as day trips from there as well. The alternative is moving your base partway through, closer to Henningsvær on Austvågøya for Day 3 and back toward Flakstadøya for Day 5, which trims driving time on those two specific days at the cost of packing and unpacking more than once.
Neither approach is wrong. A single base suits anyone who values simplicity and doesn’t mind an extra half hour of driving on the Henningsvær day; moving partway through suits anyone who’d rather minimize time in the car and doesn’t mind repacking. Either way, rorbuer — the red fishermen’s cabins repurposed as accommodation — are a natural fit for a trip built around early and late light, since many sit directly on the water within walking distance of a harbor view.
Getting around
This itinerary assumes a rental car, which is close to essential given how spread out these six stops are along and off the E10. None of the driving distances involved are long by normal standards; the reason to allow a full week for six locations is entirely about revisiting them under better light, not about covering ground.
Practical notes
Norway’s currency is the krone (NOK), and card payment is standard practice. Lofoten is an expensive destination broadly, worth budgeting for accordingly across six days of accommodation and activities. Norway sits inside the Schengen area but outside the EU, uses European C and F sockets at 230V/50Hz, and tap water is safe to drink throughout the country. The general emergency number is 112.
A few honest questions about this itinerary
Is six days too long for these six locations? Not for photography specifically — the extra time is what allows for weather-driven flexibility and second attempts, which a tighter three- or four-day version wouldn’t allow.
What if the weather is bad the whole week? Nusfjord and Henningsvær both hold up reasonably well under flat, overcast light; the beach and rorbuer locations are the ones that suffer most from poor conditions, so lean toward the village-focused stops if the forecast looks consistently grey.
Do I need to visit these six locations in this exact order? No — the order given here balances proximity with light logic, but swapping days around based on the actual forecast will usually serve your photography better than following a fixed sequence regardless of conditions.
Photography tours on GetYourGuide
Verified deep-linked GetYourGuide tours. Book through these links and we earn a small commission at no cost to you.
Photos show the destination, not the operator's own images.